
A Unique ID will be passed from the Prodege Peeq into the Alchemer platform and then back to peeq. The following details will provide you step-by-step guidance on how to set-up the redirects within Alchemer .
First, you will assign a variable to capture the Unique ID being passed from peeq. Once you log into SurveyGizmo, the very first question should be a ‘Hidden Value’ which can be located under the ‘Action’ tab.
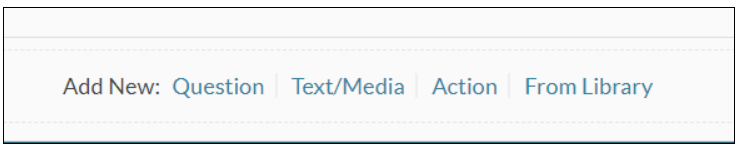
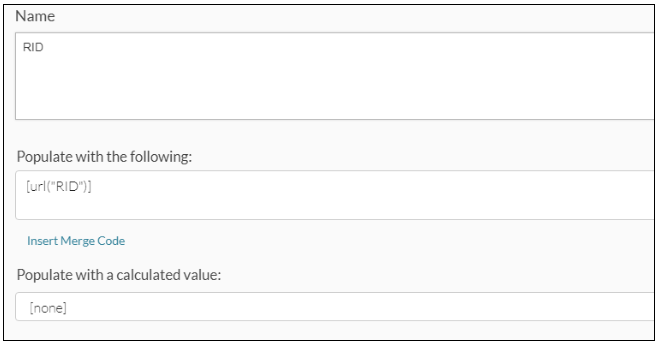
Once in the ‘Hidden Value’ page, enter the variable name you selected (RID, RISSN, VAR, etc.) which will capture the Unique ID at the entry of the survey. We will use the ‘RID’ variable as an example throughout this documentation.
It’s important to add the ‘Hidden Value’ field at the beginning of your survey since this Unique ID will be captured as each respondent enters your survey. Once the ‘Hidden Value’ field has been added, you can continue to program your survey as usual.
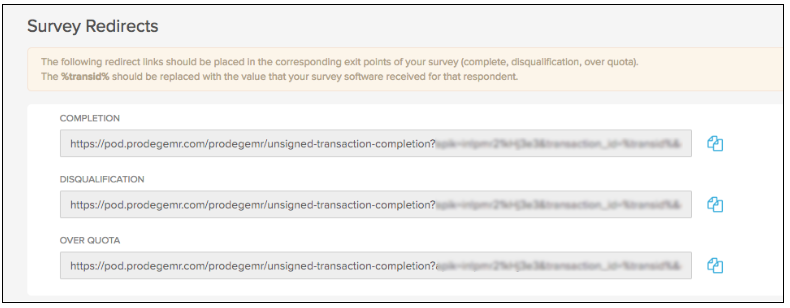
Once you’re done programming your survey next is to add to Alchemer the redirect links for Completion, Overquotas, and Disqualification.
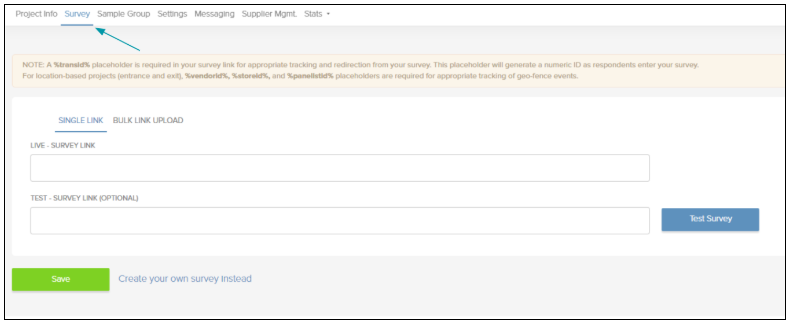
These links can be found in your project set-up within peeq on the ‘Survey’ tab near the bottom of the page.
Example: https://pod.prodegemr.com/prodegemr/unsigned-transaction-completion?apik=in!d3343433&transaction_id=%transid%&completion_type=1
Implementing Redirects in Alchemer
After the last question is programmed in Alchemer, you will need to add a page for each of the redirects that you need to implement in your survey. The example below shows the steps to implement the complete redirect successfully. Helpful Tip: It is best to add a Complete page prior to Disqualification/Terminate Page.
If you are using the Professional version of Alchemer, please note that the Over Quota page can be added to limit the number of respondents at an overall level. You will need to be on the Full Access version of Alchemerto be able to implement logic based overquotas to cap responses at a question level.
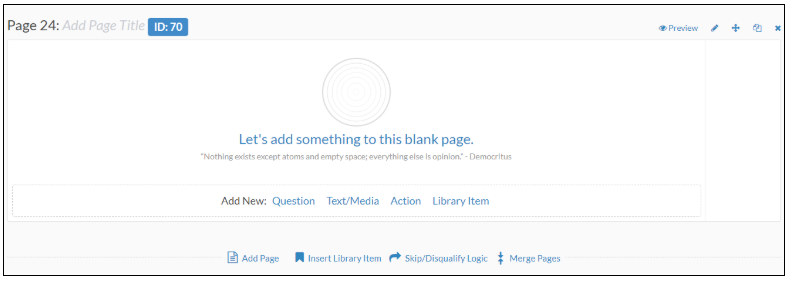
- After the last question in your survey, please click on ‘Add Page’ to add the Complete page

- A new page will show up after the last question in your survey. You will then need to click on the ‘Edit Page’ icon on the top right that will open up another page.
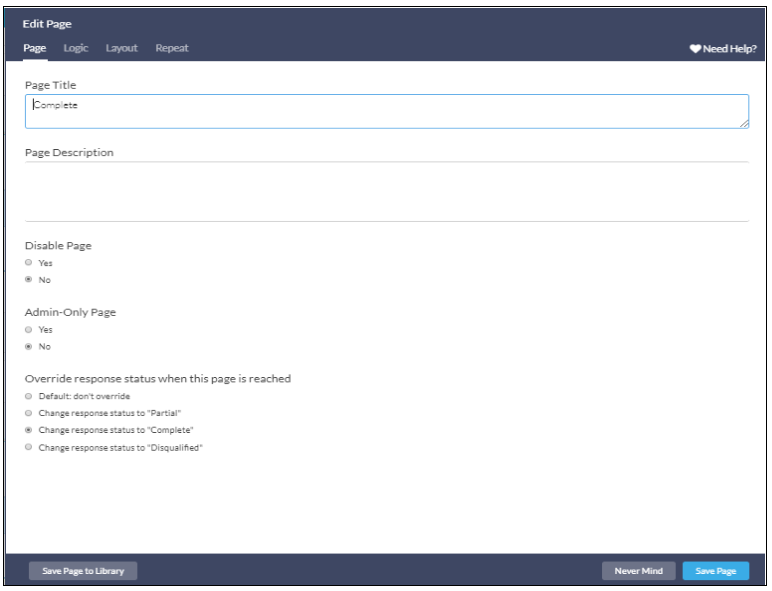
- A new page will open, then enter ‘Page Title i.e. Complete / Disqualified / Overquota’. For the ‘Complete’ page, please also ensure that the ‘Override response status when this page is reached’ is checked to “Change response Status to ‘Complete’. Then, click on ‘Save Page’ on the bottom right.
- Remain in Alchemer, select 'Action' at the bottom of the page.

- Then select ‘URL Redirect’ under the ‘Action’ section.

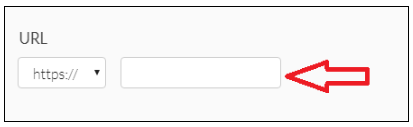
- Click on ‘Add’. You will see the screen below where you will add the redirect by removing the transaction_id variable and the https from the link you copied from peeq.
- At the bottom of the page, you will ‘Select a Question to Map’ from a dropdown list. You will then select the ‘RID’ variable since that is the variable name we entered in the ‘Hidden Value’ page at the beginning of the setup process.
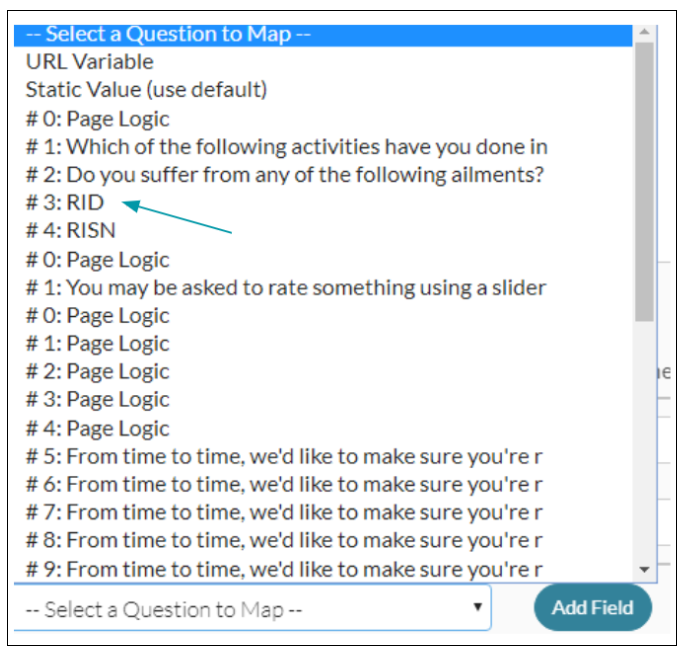
- You need to add ‘transaction_id’ under a variable name corresponding to ‘RID’, then ‘Save Action’. This step will ensure that the value sent through the RID variable in the survey link is passed back to peeq through the transaction_id variable in the redirects.

Once the 'Complete' page is set up, repeat the above steps for the Disqualify and Overquota pages that you add after the 'Complete' page. The only change that you need to make is the 'Override' response status when this page is reached' is checked to Change response status to 'Disqualified' when you set up the pages for Disqualify and Overquota.
Implementing Terminate/Disqualification Logic in Alchemer
Now that your termination page is set up, you will need to implement the logic to not allow respondents to answer any additional questions based on the answers provided.
- At each question page in Alchemer, you will have the following options. Click ‘Skip/Disqualify Logic’ to open up a new page that will allow you to set up the 'Skip/Disqualify Logic’. You can add the ‘Skip/Disqualify’ logic to all questions with a terminate point.
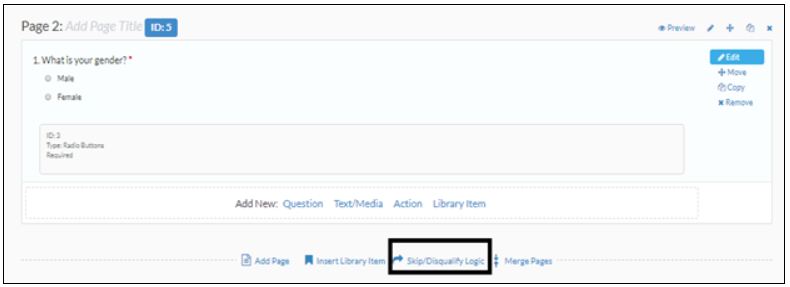
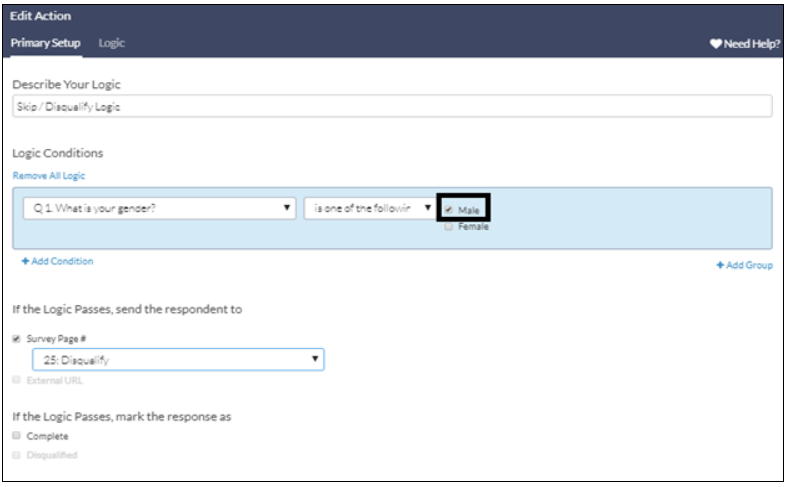
- On the new page that opens up, set the exact logic on which you want to filter out respondents and redirect them to the Disqualify Page if they don’t qualify for your target group.
The example below shows how to set up a ‘Disqualify’ logic if a respondent is male which will redirect the respondent to the ‘Disqualify’ page (Page 25 in this case) that you have created.
- Repeat the above steps for all disqualification/termination points in the survey.
Implementing Quotas and to Overquota Redirect Links
Alchemer allows you to set an overall quota limit for your survey if you are subscribed to the Professional version of the platform. Also, if you are using the Full Access version of Alchemer, you have the ability to set up logic based quotas to set maximum responses at a question level.
Below is the step by step process to set up quotas in Alchemer and redirect respondents to the Overquota page once the quota maximum has been reached.
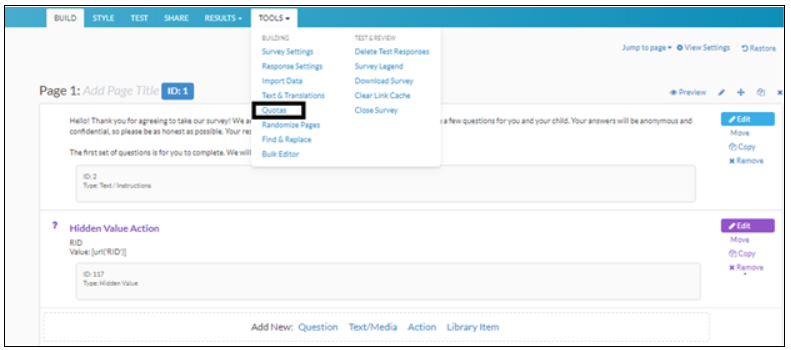
- On the top right side of the survey page, go to ‘Tools’ and select ‘Quotas’ from the dropdown.
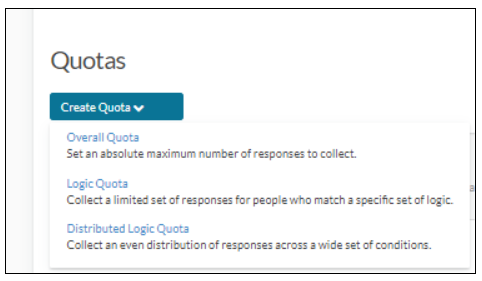
- Once you are on the ‘Quotas’ page, click on ‘Create Quota’ and select ‘Overall Quota’ or ‘Logic Quota’ depending on which version of SurveyGizmo you have access to (Professional or Full Access) and the type of quota you want to set up.
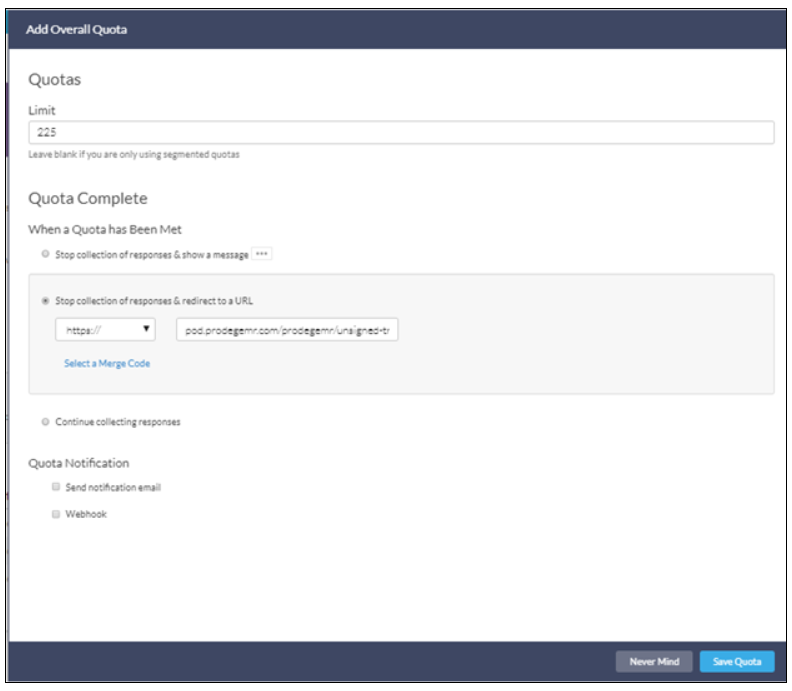
- To set up an overall quota, click on ‘Overall Quota’ to open up a new page. On the new page, enter the quota size under the ‘Limit’ box. Then select ‘Stop collection of responses & redirect to a URL’ under the ‘Quota Complete’ section to paste the URL that respondents will be redirected to, upon Overquotaing. Paste the following URL right next to the box that says “https” to redirect Overquota respondents to the correct page. Then click the ‘Save Quota’ on the bottom right to come back to the ‘Quota’ page.
Example: pod.prodegemr.com/prodegemr/unsigned-transaction-completion?apik=PAT!HMpwEa8t$I&completion_type=2&transaction_id=[url("RID")]
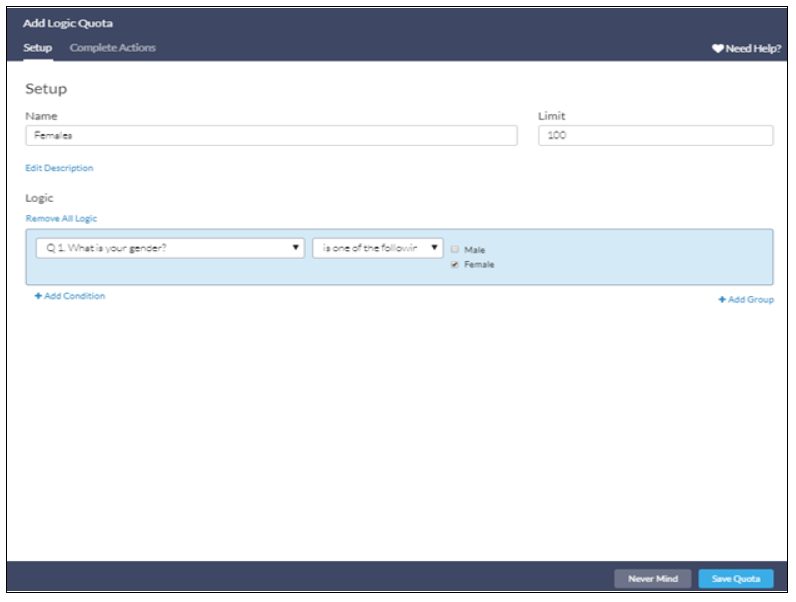
- If you have the Full Access version of Alchemer, you have the ability to set up a logic-based quota. Click on ‘Logic Quota’ from the ‘Create Quota’ dropdown. On the new window that opens up, enter the name of the quota you want to set a limit on (Females in the example below). Under the Limit box, set up the quota size (100 in the example below). Then set the exact logic based on which SurveyGizmo will count respondents towards the quota.
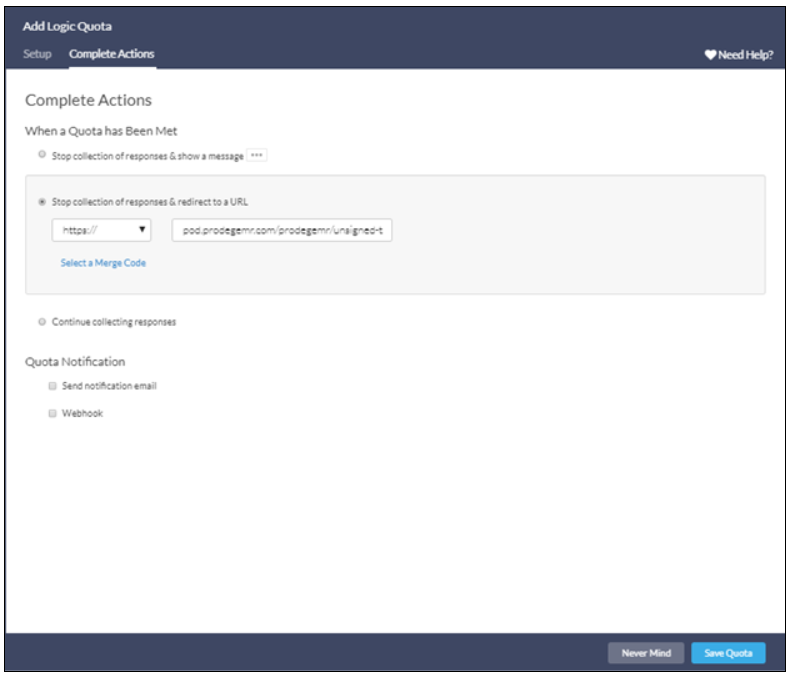
- Once the logic is set up, toggle to the ‘Complete Actions’ section and select ‘Stop collection of responses & redirect to a URL’ under the 'Quota Complete' section paste the URL that respondents will be redirected as an Overquota. Paste the following URL right next to the box that says “https” to redirect OQd respondents to the correct page. Then click on ‘Save’ quota on the bottom right to come back to the Quota page.
Example: pod.prodegemr.com/prodegemr/unsigned-transaction-completion?apik=PAT!HMpwEa8t$I&completion_type=2&transaction_id=[url("RID")]
Now you are ready to test through peeq to confirm the Terminate and Complete redirects and logic are working properly. Confirm the Unique IDs are captured in both peeq and Alchemer accurately.
Have more questions or need additional support?
Our experts are happy to do a screen share and walk-through this process with you.
Submit a request or Live Chat with us!